Many businesses rely on SMS verification services daily. Verifying users is especially important for websites that interact with online user registrations, financial activities, or providing one-time passwords. So, SMS is among the most widespread types of multi-factor authentication (MFA). Moreover, no apps or digital keys are required, and it is not dependent on a specific ecosystem. Therefore, it helps to streamline various user workflows in our applications.
This article will discuss SMS verification in detail, its advantages, best practices, and a how-to guide on sending SMS verification with Node.js.
For a more detailed real-world implementation guide that shows SMS and email password verification using Node.js and Next.js, please visit this step-by-step tutorial
What Is SMS Verification?
SMS verification is a two-factor authentication system that enables users to get a shortcode to their mobile phones, which are used to verify their identity when logging into an application. It provides enhanced security because a hacker would need to have your username, password, and physical access to your phone, which will probably have authentication on its own, to login into an application. SMS verification, also known as phone verification, has its own set of security risks but is still widely used and a popular two-factor authentication method in many use cases.
SMS Verification Use Cases
SMS verification is the go-to method for many use cases by businesses when dealing with their application users.
Two-factor authentication
Two-factor authentication adds an extra layer of security whenever a user signs in to the application by asking them to enter a short code sent to their mobile phone via an SMS after adding their user credentials. Though this has some security risks, the ease of use is among the benefits it carries.
Account recovery
When looking at how many usernames and passwords are stolen each year, resetting passwords via email might no longer be secure. SMS verification is used as a popular alternative to verify the user's identity before resetting the password.
Validate and minimize fraudulent transactions
Financial service providers widely use SMS verification to minimize fraudulent transactions by asking the users to verify themselves via a code sent to their mobile phones before allowing them to continue. Banks also have made wide use of SMS verification to verify their users before making any transaction online via their bank accounts.
Benefits of SMS Verification
Methods such as FIDO2 and mobile authenticator applications are gaining popularity as alternatives to SMS verification. However, it has been trendy and still widely used by businesses and application users due to its benefits. Therefore it is essential to discuss the benefits of using SMS verification.
Secure: Using just passwords for application authentication has become weak due to users using the same passwords for multiple accounts, bad storing practices, forgetting to recycle, etc. Therefore, SMS verification can increase security significantly as it makes it hard for people with malicious intentions to access user accounts.
Ease of use: Almost everyone has access to a mobile phone today, which has made SMS verification a popular choice since there are no additional costs on software or hardware devices, and users already know how to operate their mobile phones.
Convenience: With the growing number of online accounts we create each day, we need to remember a new password almost every day. SMS verification reduces this burden by not having to remember passwords and sending a unique code to the user's mobile, which can be used to verify their identity.
Implementing SMS Verification with Node.js
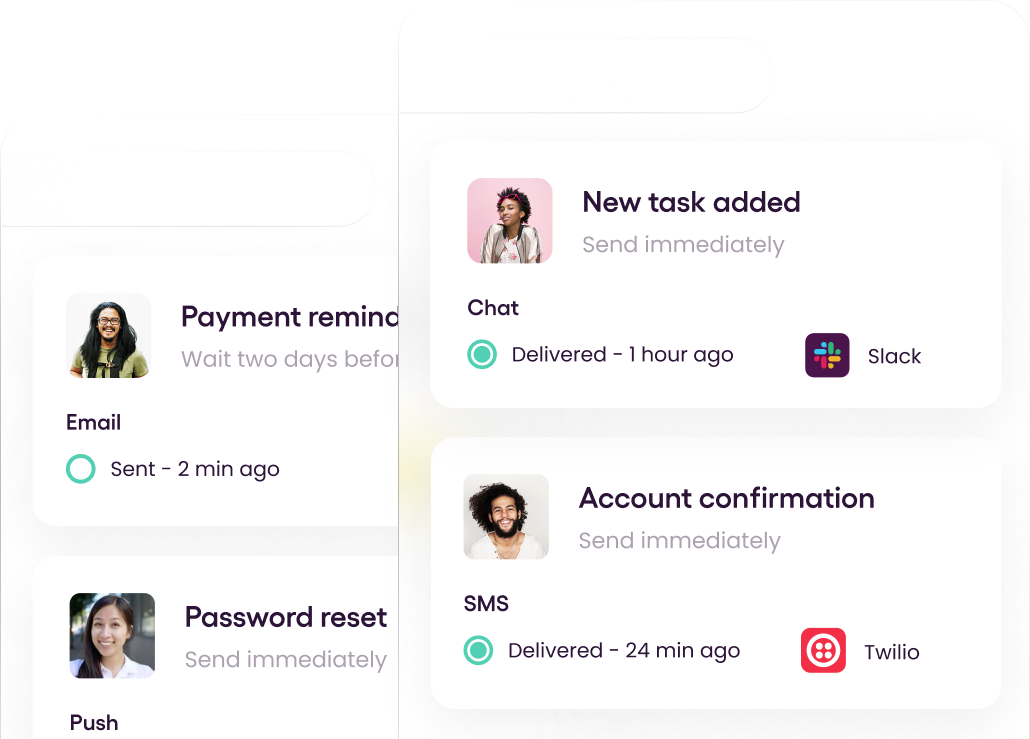
Now, Let's see how to implement a simple user verification process via SMS verification in a Node.js application. To implement the SMS verification, I will be using Courier with Twilio here. Courier is a platform that allows its users to send notifications to their clients on multiple channels easily using a single API call. Furthermore, they let their users design their notifications and give real-time insights into each channel's status and engagement data.
Step 1: Sign up with Twilio and Courier.com
We will be using Twilio via Courier, and we need to have accounts on both platforms. We can use the Twilio trial as it provides new users with $15 worth of credits which are more than enough to do some experiments.
Step 2: Add Twilio integration to Courier
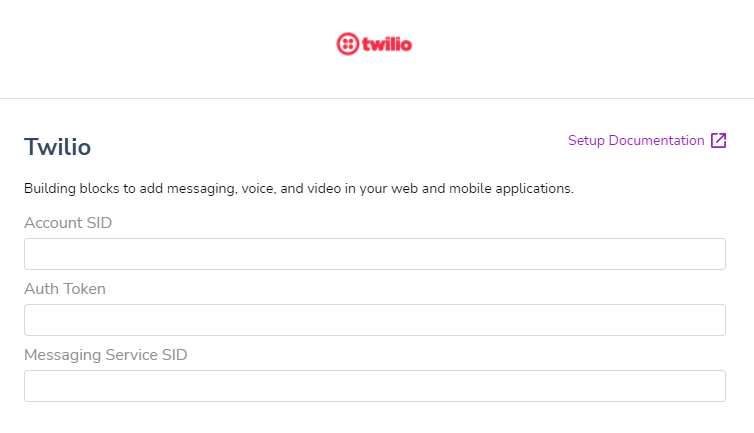
To use Twilio via Courier, we need to add the integration with Twilio. To do this, log into the application, go to the Integrations page, and select Twilio to add the integration. You should be able to see a window like the one below.
Step 3: Buy a Twilio number, create a messaging service and complete the integration
We need a trial number and service dedicated to our application to complete the integration. As Twilio provides excellent documentation on using Twilio, I will post a Twilio guide on how to get a trial number. Following this guide, you can buy a Twilio trial number.
Next, navigate to the messaging services page and follow up with the prompts to create a messaging service.
Then you should find your messaging service SID, which is required for the integration, while Account SID and Auth Token can be found under the dashboard section.
Step 4: Create the application and add the Courier Node.js SDK
Next, we will create our Node.js application with Express, Mongoose, and several other dependencies and quickly set up our express server.
1
2
3
4
5
6
7
8
9
10
11
12
13
14
15
16
17
const app = require("./app");
const mongoose = require("./config/mongoose");

const PORT = process.env.PORT || 5000;

async function StartServer() {
    try {
        await mongoose();
        server = app.listen(PORT, () => {
        console.log(Listening on port ${PORT} );
        });
    } catch (error) {
        console.error(Fail to start server: ${error} );
        process.exit(-1);
    }
}
StartServer();
Next, we will add the Node.js SDK of Courier using npm i @trycourier/courier
Step 5: Get the courier API token and setup messaging service
Courier API token can be found under Settings -> API Keys, which can be used to set up the messaging function using the SDK as below.
1
2
3
4
5
6
7
8
9
10
11
12
13
14
15
16
17
18
19
20
21
22
23
const { CourierClient } = require("@trycourier/courier");
const courier = CourierClient({
    authorizationToken: process.env.COURIER_TOKEN,
});

const sendVerificationMessage = (params, mobileNumber) => {
    return courier.send({
    message: {
        to: {
            data: params,
            phone_number: mobileNumber,
        },
        content: {
            title: "XYZ Verification",
            body: "Hi {{name}},\nYour verification code for XYZ is {{otp}}.",
        },
        routing: {
            method: "single",
            channels: ["sms"],
        },
    },
    });
};
Step 6: Create user sign-up and OTP endpoints.
Next, we need to have our endpoints for a user to sign up for the application and also to send, resend and verify the OTP codes.
First, I will create the user sign-up function. I have already created a simple user model with username, password, mobileNumber, name, and statusattributes.
1
2
3
4
5
6
7
8
9
10
11
12
13
14
15
16
17
18
19
20
21
22
23
24
25
26
27
28
29
30
31
const userSchema = new mongoose.Schema(
    {
        username: {
            type: String,
            required: true,
            trim: true,
        },
        password: {
            type: String,
            required: true,
            trim: true,
        },
        mobileNo: {
            type: String,
            required: true,
            trim: true,
        },
        name: {
            type: String,
            required: true,
            trim: true,
        },
        status: {
            type: String,
            required: true,
        },
    },
    {
        timestamps: true,
    }
);
Once I have the user model, I will add the user sign-up implementation.
1
2
3
4
5
6
7
8
9
10
11
12
13
14
15
16
17
18
19
20
21
22
23
const UserModel = require("../model/user.model");

const signUp = async ({ username, password, mobileNo, name }) => {
    try {
        const user = new UserModel({
            username,
            password,
            mobileNo,
            name,
            status: "PENDING",
        });

        const savedUser = await user.save();
        return savedUser;
    } catch (error) {
        console.error(error);
        throw error;
    }
};

module.exports = {
    signUp,
};
Next, we need to create the OTP service. When we are saving the OTP, we need to save it with the username and time in which the OTP is expiring to verify the OTP later.
1
2
3
4
5
6
7
8
9
10
11
12
13
14
15
16
17
18
19
20
21
22
23
24
25
26
27
28
29
30
31
32
33
34
35
36
37
38
39
40
41
42
43
44
45
46
47
48
49
50
51
52
53
54
55
56
57
58
59
60
61
62
63
64
65
66
67
68
69
70
71
72
73
74
75
76
77
78
79
80
81
82
83
84
85
86
87
88
89
90
const { CourierClient } = require("@trycourier/courier");
const otpGenerator = require("otp-generator");

const OTPModel = require("../model/otp.model");
const UserModel = require("../model/user.model");

const courier = CourierClient({
    authorizationToken: process.env.COURIER_TOKEN,
});

const sendOTP = async (username, mobile, name) => {
    try {
        const otp = otpGenerator.generate(6, {
            upperCaseAlphabets: false,
            specialChars: false,
        });

        await addNewOTP(otp, 15, username, "PENDING");
        await sendVerificationMessage(
            {
                name,
                otp,
            },
            mobile
        );
        return {
            success: true,
            message: "OTP sent successfully",
        };
    } catch (error) {
        console.error(error);
        throw error;
    }
};

const reSendOTP = async (username, mobile, name) => {
    try {
        await rejectPendingOTP(username);
        return await sendOTP(username, mobile, name);
    } catch (error) {
        console.error(error);
        throw error;
    }
};

const verifyOTP = async (username, otp) => {
    try {
        const validOTP = await OTPModel.findOne({
            otp,
            username,
            status: "PENDING",
            expireIn: { $gte: new Date().getTime() },
        });

        if (validOTP) {
            await OTPModel.updateOne(
                { _id: validOTP._id },
                { $set: { status: "CONFIRMED" } }
            );
            await UserModel.updateOne({ username }, { $set: { status: "VERIFIED" } });
            return {
                success: true,
                message: "User verified",
            };
        }
        throw new Error("Invalid OTP");
    } catch (error) {
        console.error(error);
        throw error;
    }
};

const sendVerificationMessage = (params, mobileNumber) => {
    return courier.send({
        message: {
            to: {
                data: params,
                phone_number: mobileNumber,
            },
            content: {
                title: "XYZ Verification",
                body: "Hi {{name}},\nYour verification code for XYZ is {{otp}}.",
            },
            routing: {
                method: "single",
                channels: ["sms"],
            },
        },
    });
};
Once we are done, we need to call the send OTP method after the user signs up to verify the user.
Step 7: Setup the user routes and complete the application.
Add the required user and OTP routes to the application and finish wiring up the application. The complete implementation can be found here.
Best Practices for Node.js SMS Verification
Implement timeouts on resend button
To avoid a user from receiving multiple verification codes at once, implement a timeout for the resend button where a user has to wait for some time before trying to get a new code.
Implement retries with exponential backoff
An API call to send a message can fail due to many reasons. In such a case, always track failures and retry for a previously decided maximum number of times while exponentially increasing the wait time between retries.
Consistently use a single sender ID when contacting users
A single sender ID should be used when contacting a user so that the user does not have to switch between conversations when checking the service messages, and most importantly, it builds up trust with the user while providing the best user experience.
Wait for message storage confirmation before sending the SMS
Save the message sending record in the database for tracking and confirming the record, and always wait for a successful response from the save operation before sending the SMS. Because in case the save operation fails, then the verification code will give the user an error even though it is a valid message.
Conclusion
SMS verification is a widely used method for two-factor authentication and many other use cases. Despite its ease of use and convenience, SMS verification has significant drawbacks, and businesses must consider whether it is adequate to safeguard their data. However, since users are so used to the method, it has become necessary to have SMS verification in your web/mobile application.
So, you can try it out in your next Node.js application with Courier, as we discussed above. I hope you will find this article helpful. Thank you for reading!