Email sending functionality is a must-have for all large-scale customer-oriented applications to notify users about application events. It's a straightforward, low-cost, and easy-to-use method of communication with your users, especially to send event-driven notifications like account activation, password changes, and user verification. So, it has become a frequent form of asynchronous communication with end-users, ranging from simple notifications with plain text to comprehensive reports with links and many attachments.
For many years, Java has ranked as one of the most popular programming languages. Enterprises consider Java the ideal language to use since it helps you handle the most common issues that arise when designing enterprise applications.
In this article, I will discuss three different ways to send Emails with Java while discussing the pros and cons of each method.
1. Using JavaMail API
JavaMail API is a platform-independent and protocol-independent framework to develop Java client applications for mails and messaging. It is a generic interface to email programs that provides abstract classes containing objects created in the email system.
Pros:
- It is well-structured and widely used.
- Provides multiple options, including reading, composing, and sending emails.
- Other programs can use the Java Mail API to make sending mail confirmations or other messages easier.
Cons:
- Codes may take a little longer to compile.
- Using the Mail API may consume a significant amount of JAVA heap space.
Demonstration
Step 1 - Installing JavaMail API
First, you need to include two jar files into your CLASSPATH:
After including jar files, you can start sending emails. However, you need an SMTP server to send emails using JavaMail API. You can easily set up an SMTP server using a provider like Pepipost.
Step 2 - Getting the mail session
As the second step, you need to get the session object. The session object contains all the information related to the host like name, user name, password, etc. For that, you can use one of the methods provided by javax.mail.Session class.
1
2
3
4
5
6
7
Properties properties = new Properties(); // properties object contains host information
Session session=Session.getDefaultInstance(properties,null);

// or

Properties properties = new Properties(); // properties object contains host information
Session session=Session.getInstance(properties,null);
Also, you can pass the username and the password to obtain authentication for a network connection.
1
2
3
4
5
Session session = Session.getInstance(properties, new javax.mail.Authenticator() {
  protected PasswordAuthentication getPasswordAuthentication() {
    return new PasswordAuthentication("sender@gmail.com", "***");
  }
});
Step 3 - Composing the email
You can use the javax.mail.internet.MimeMessage subclass to compose the message. First, you need to pass the session object to MimeMessage class. Then you can configure the sender, receiver, subject, and message body.
1
2
3
4
5
6
7
8
9
MimeMessage message = new MimeMessage(session);
// Sender email
message.setFrom(new InternetAddress(from));
// Receiver email
message.addRecipient(Message.RecipientType.TO, new InternetAddress(to));
// Email subject
message.setSubject("This is the email subject");
// Email body
message.setText("This is the email body");
Step 4 - Sending the email
Finally, you can use the javax.mail.Transport class to send the email.
1
Transport.send(message);The complete code example of sending an email using JavaMail APi will look like below:
1
2
3
4
5
6
7
8
9
10
11
12
13
14
15
16
17
18
19
20
21
22
23
24
25
26
27
28
29
30
31
32
33
34
35
36
37
38
39
40
41
package com.sendemail;
import java.util.Properties;
import javax.mail.Message;
import javax.mail.MessagingException;
import javax.mail.PasswordAuthentication;
import javax.mail.Session;
import javax.mail.Transport;
import javax.mail.internet.InternetAddress;
import javax.mail.internet.MimeMessage;

public class SendMail {
    public static void main(String[] args) {
      String to = "receiver@gmail.com";
      String from = "sender@gmail.com";
      String host = "smtp.gmail.com";

      Properties properties = System.getProperties();
      properties.put("mail.smtp.host", host);
      properties.put("mail.smtp.port", "465");
      properties.put("mail.smtp.ssl.enable", "true");
      properties.put("mail.smtp.auth", "true");

      Session session = Session.getInstance(properties, new javax.mail.Authenticator(){
        protected PasswordAuthentication getPasswordAuthentication() {
          return new PasswordAuthentication("receiver@gmail.com", "*******");
        }
      });

      try {
        MimeMessage message = new MimeMessage(session);
        message.setFrom(new InternetAddress(from));
        message.addRecipient(Message.RecipientType.TO, new InternetAddress(to));
        message.setSubject("This is the email subject");
        message.setText("This is the email body");

        Transport.send(message);
      } catch (MessagingException mex) {
        mex.printStackTrace();
      }
   }
}
2. Using Simple Java Mail
Simple Java Mail is a simple mailing library with a straightforward API. As a result, it's one of the most user-friendly (Java) mailing libraries for sending SMTP emails. Simple Java Mail is a wrapper around the JavaMail API library, and it simplifies the email sending process by removing several classes and properties.
Pros:
- This library is robust, small, and lightweight (134kB).
- It complies with all RFCs and looks good in all email clients.
- It's also the world's only java mailing library that can send through an authenticated SOCKS proxy.
- Support for HTML, images, and attachments.
- Can send email to multiple receivers at once.
Cons:
- Small community support compared to JavaMail API.
Demonstration
Sending emails using Simple Java Mail is pretty straightforward. First, you need to create an email object using EmailBuilder. Then, you need to create a mailer object using MailerBuilder and pass the email object to the mailerobject to send the email.
1
2
3
4
5
6
7
8
9
10
11
12
13
14
Email email = EmailBuilder.startingBlank()
    .from("From", "from@example.com")
    .to("1 st Receiver", "rec1@example.com")
    .to("2 nd Receiver", "rec2@example.com")
    .withSubject("Email Subject")
    .withPlainText("Email Body")
    .buildEmail();

Mailer mailer = MailerBuilder
    .withSMTPServer("smtp.mailtrap.io", 2525, "username", "password")
    .withTransportStrategy(TransportStrategy.SMTPS);
    .buildMailer();

mailer.sendMail(email);
In addition to the above, Simple Java Mail provides various options to configure email and the mailer. You can find more details about them in Simple Java Mail documentation.
3. Using a Multi-Channel Notification Service
Multi-channel notification services can notify users across multiple channels such as Emails, SMS, Push Notifications. With the modern application requirements, using a multi-channel notification service like Courier can streamline your notification flow by creating all the relevant channels with them a single API.
Pros:
- With a single API, you can notify users across different notification channels.
- Because all channels use the same API, you won’t have to manage a large codebase, which will make it easier to maintain.
- Without modifying your code, you can add more notification channels in the future.
- As a result, your notification service can be managed by any non-technical user.
Cons:
- Consuming many notification channels can be costly.
- The maximum number of notifications you can receive per month limits you.
Demonstration
For this demonstration, I will be using Courier since it offers a free plan of 10,000 emails per month and even provides you with the capability of using your Email Service Provider. Additionally, it integrates seamlessly with popular transactional email APIs such as SendGrid and Amazon SES, allowing you to effectively manage your multi-channel notification workflow. Furthermore, Courier provides you with an easy setup process to help you configure your application to send emails using Gmail in minutes!
Step 1 - Creating a Courier account
You can easily create a free Courier account using the following link - https://app.courier.com/signup.
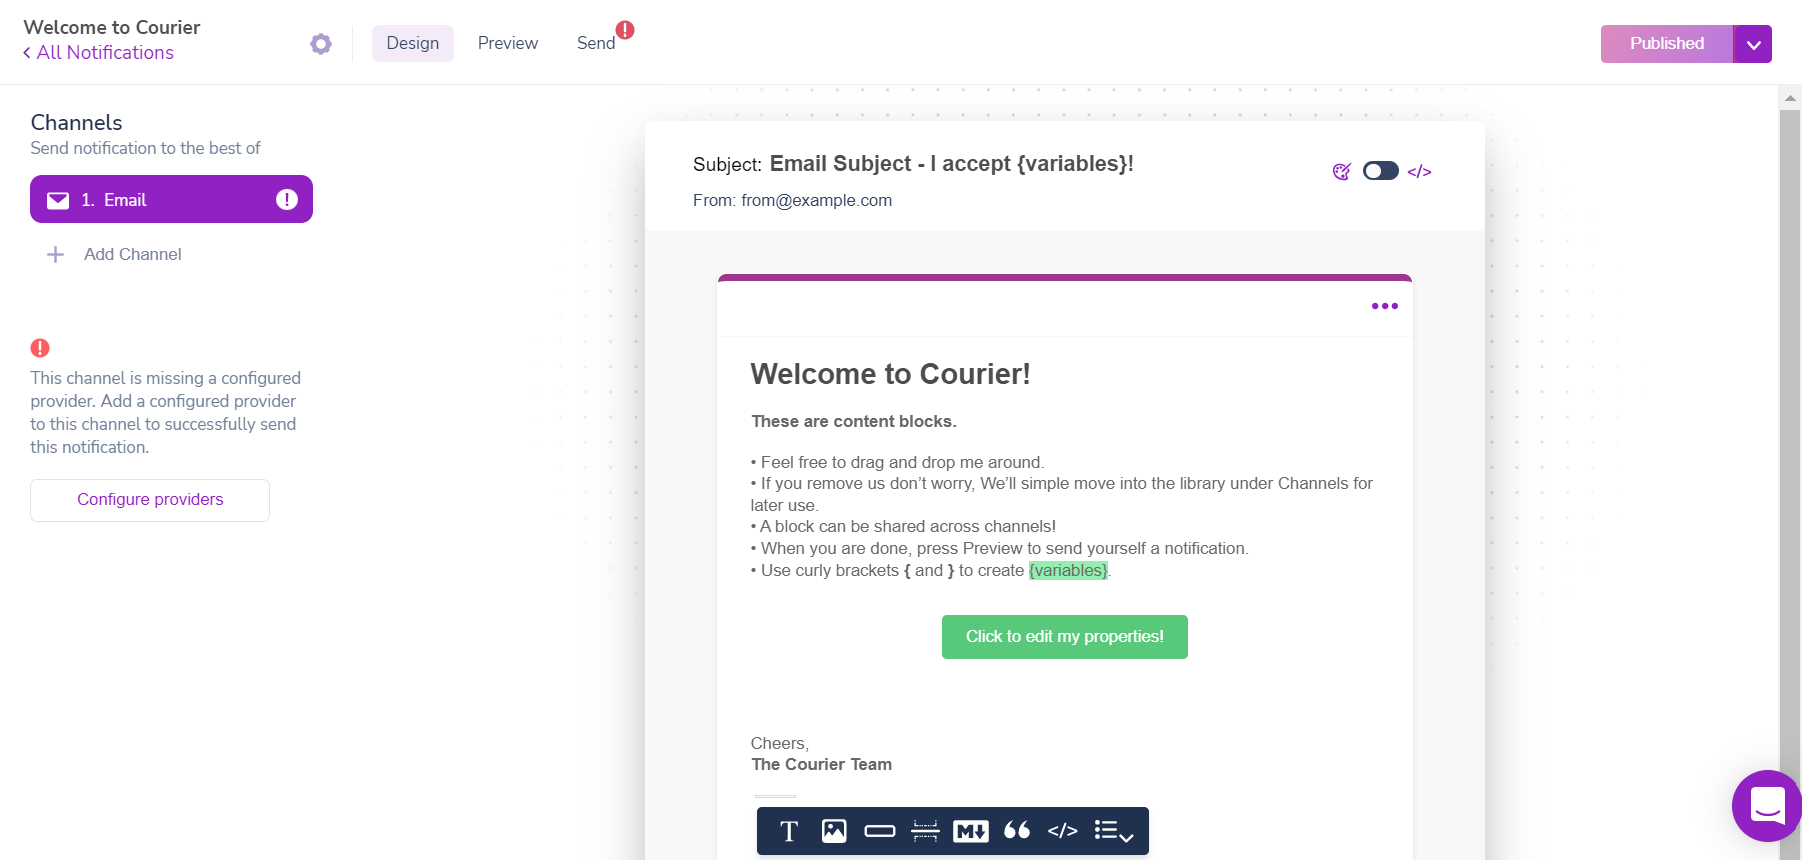
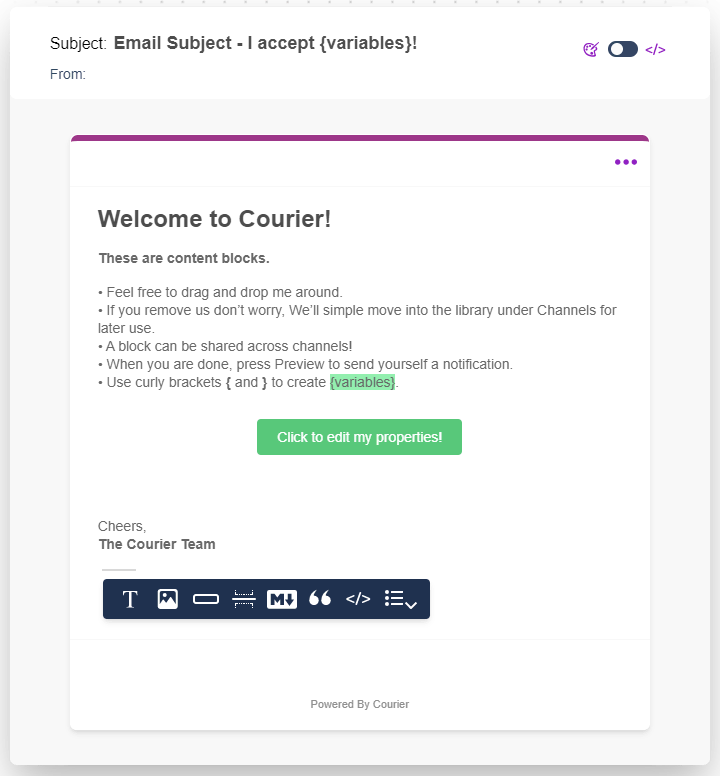
Step 2 - Creating a notification
After creating the account, you need to create a notification. For that, select the Designer tab from the Courier dashboard. You should see the output shown below.
Step 3 - Configuring the providers
Now, click the Configure providers button to integrate your Gmail account.
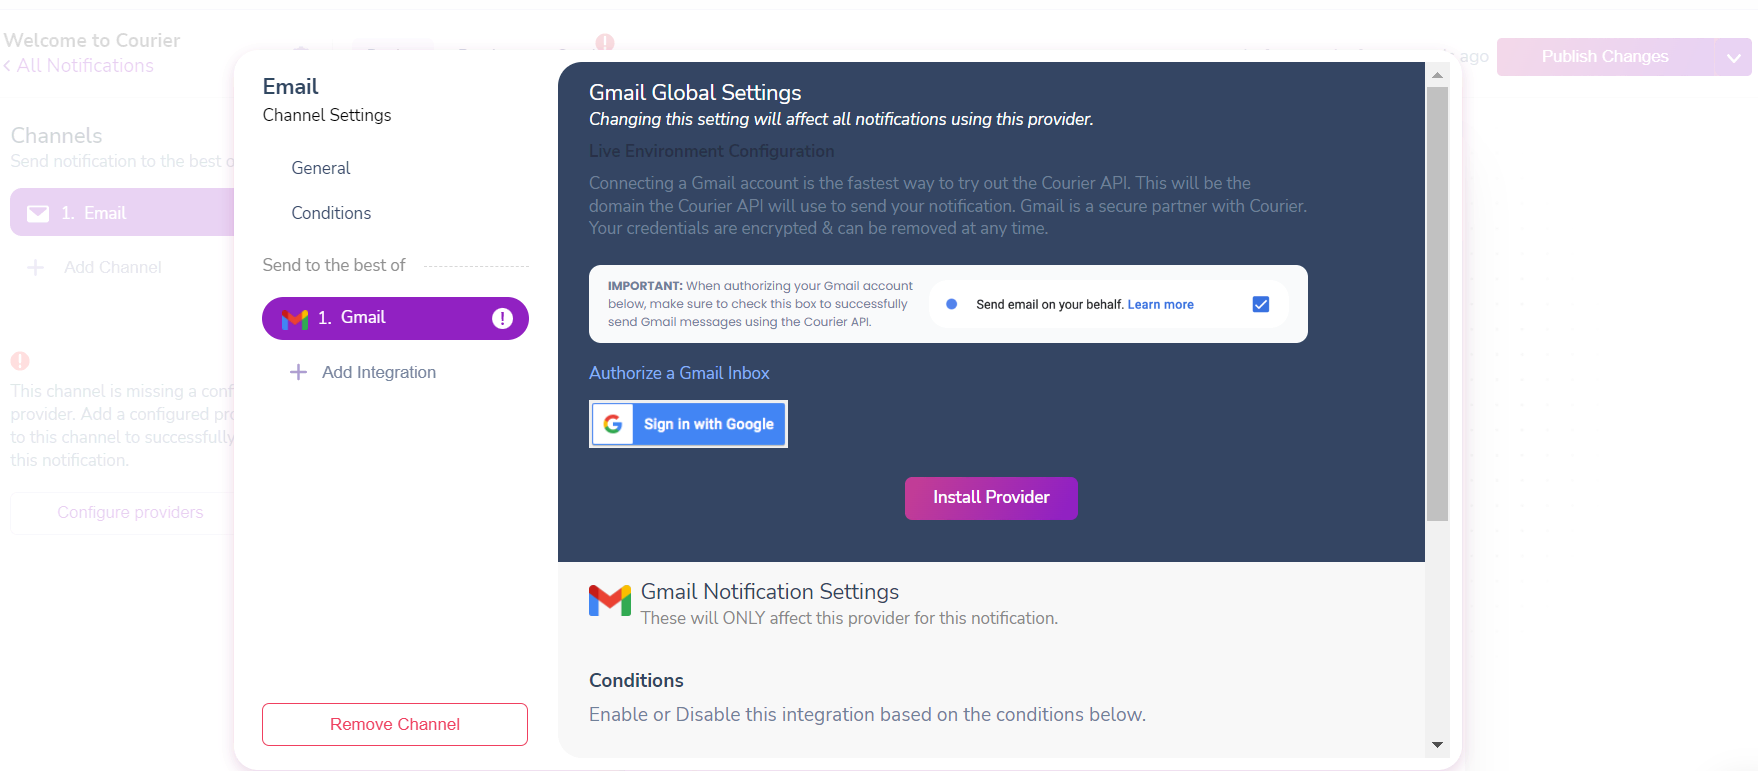
It will ask you to authorize your Google account to send emails and you can find the finalized configuration in the Integrations tab.
Step 5 - Customizing the email template
After adding the provider, you can customize your template by adding a logo, code blocks, bullet lists, and attaching dynamic data.
Step 6 - Authorising Google to send emails
Next, we can install the Courier API to the Java application. First, you need to update the Maven pom.xml file with the below dependency and run mvn compile to download it.
1
2
<dependency><groupId>com.courier</groupId><artifactId>courier-java</artifactId><version>X.X.X</version><scope>compile</scope>
</dependency>
After successfully installing, use the code shown below to send an email through Gmail using Courier.
1
2
3
4
5
6
7
8
9
10
11
12
13
14
15
16
17
18
19
20
21
22
23
24
25
26
27
28
29
30
31
32
33
34
35
36
37
38
39
40
41
42
43
import services.Courier;
import services.SendService;
import models.SendEnhancedRequestBody;
import models.SendEnhancedResponseBody;
import models.SendRequestMessage;
import com.google.gson.Gson;
import java.io.IOException;
import java.util.HashMap;

public class App {
  public static void main(String[] args) {
    Courier.init("YOUR_AUTH_TOKEN_HERE");

    SendEnhancedRequestBody request = new SendEnhancedRequestBody();
    SendRequestMessage message = new SendRequestMessage();

    HashMap<String, String> to = new HashMap<String, String>();
    to.put("email", "email@example.com");
    message.setTo(to);

    HashMap<String, Object> content = new HashMap<String, Object>();
    content.put("title", "Welcome!");
    content.put("community", "Thanks for signing up, {{name}}");
    message.setContent(content);

    HashMap<String, Object> data = new HashMap<String, Object>();
    data.put("name", "Peter Parker");
    message.setData(data);

    HashMap<String, Object> routing = new HashMap<String, Object>();
    routing.put("method", "single");
    routing.put("channels", ["email"]);
    message.setRouting(routing);

    request.setMessage(message);
    try {
       SendEnhancedResponseBody response = new SendService().sendEnhancedMessage(request);
       System.out.println(response);
     } catch (IOException e) {
       e.printStackTrace();
     }
  }
}
The Courier email notification has four main properties:
to: Provides information used by Courier to identify the recipient of the notification.content: This property is used to add your notification’s title and body.data: Includes the data you want to pass to a message template.routing: Used to customize which channel(s) Courier will potentially deliver the message.
Conclusion
This article discussed three different ways of sending an email using Java. Each of the discussed libraries and services has unique features, and you can choose one based on your requirements.
I hope this article helps you choose the best way to send emails in Java applications. Thank you for reading.