You’re surely familiar with those little messages that appear on your phone to let you know about discounts, limited-time offers, or other time-sensitive alerts from your favorite apps. These promotional and transactional messages are called push notifications.
They’re a handy method to increase app retention and share targeted communication with your subscriber base. According to Airship, sending high-value notifications can boost app retention rates by three to ten times.
There are tons of use cases for push notifications. Bloggers can share new articles; e-commerce stores can send transactional messages; SaaS companies can share retargeting ads; and many more.
In this article, you’ll learn about three of the best ways implement push notifications in your Flutter app.
Implementing Flutter Notifications
To implement push notifications in Flutter, you can use Firebase Cloud Messaging, Apple Push Notifications, and Courier for multi-channel messaging. Let's take a closer look at each of these services.
You can find all the code for this tutorial in this GitHub repo.
Apple Push Notification service (APNs)
APNs is an iOS push notification delivery service that allows sending notifications to Apple devices from remote servers or using command line tools.
Pros of APNs
- As APNs is already integrated into the iOS operating system, you do not need to add libraries to include a push notification service.
- You can generate local notifications from your app and display them to your user.
Cons of APNs
- APNs is limited to Apple products only, thus inhibiting usage on other platforms, like Android.
- APNs requires enrollment to the paid developer account.
How to Implement APNs
When building iOS apps with Flutter, APNs push notifications can be integrated seamlessly.
First, you need to configure your app for APNs by enabling Push Notifications in Xcode under App > Signing & Capabilities.
Please note that you need to be enrolled to the paid developer program to see this capability.
To use APNs for push notifications, add the flutter_apns_only: package into your pubspec.yaml file.
Then add the following lines to the didFinishLaunchingWithOptions method, just before the return statement in the AppDelegate.swift file of your iOS project:
1
2
3
if #available(iOS 10.0, *) {
UNUserNotificationCenter.current().delegate = self as? UNUserNotificationCenterDelegate
}
Lastly, open the terminal pointing at project_name/ios and run the following command to install the necessary dependencies:
1
pod installYou also need to request permissions to display notifications to the user. If granted, a device token will be generated.
To register callbacks that are triggered every time a notification is received, update your main.dart file to have the following contents:
1
2
3
4
5
6
7
8
9
10
11
12
13
14
15
16
17
18
19
20
21
22
23
24
25
26
27
28
29
30
31
32
import 'package:flutter_apns_only/flutter_apns_only.dart';

void main() {
  WidgetsFlutterBinding.ensureInitialized();
  final connector = ApnsPushConnectorOnly();

// onLaunch gets called, when you tap on notification on a closed app
// onResume gets called, when you tap on notification with app in background
// onMessage gets called, when a new notification is received

  connector.configureApns(
    onLaunch: (message) async {
      print('Notification launched app');
    },
    onResume: (message) async {
      print('Notification tapped when in the background');
    },
    onMessage: (message) async {
      print('New notification received');
    },
  );

//Requesting user permissions
  connector.requestNotificationPermissions();

//Retreive and print device token
  connector.token.addListener(() {
    print('Token ${connector.token.value}');
  });

  runApp(const MyApp());
}
Finally, to support displaying notifications while the app is in the foreground, include the following line of code:
1
connector.shouldPresent = (x) => Future.value(true);At this point, you can run your app and test the implementation. You can consult this repo for the full code.
Firebase Cloud Messaging (FCM)
FCM is Firebase's solution for sending notifications to users. It's cross-platform, free, and comes with some targeting options.
Pros of FCM
- It’s free to use.
- It allows for granular message targeting.
- It provides tools for A/B Testing that are extremely helpful for experimentation.
- It offers detailed analytics to help you make better marketing decisions
Cons of FCM
- FCM doesn't work where Google is banned (Iran/North Korea/China/etc.).
- Potential vendor lock-in, as Firebase is closed-source.
How To Implement FCM
FCM requires a few configuration steps for both Android and iOS before you can start receiving messages. This section describes how to go about setting up the FCM SDK for both.
Create Flutter Project
First, create a Flutter project and open it in your IDE. This tutorial will use Visual Studio Code. In the terminal, type in the following:
1
2
3
4
5
flutter create PROJECT_NAME

cd PROJECT_NAME

code .
Create Firebase Project
Create a new Firebase project. Go to your Firebase Console and click on Add project.
On the next screen, give your project a title and then click Continue. Finally, deselect the Google Analytics data and click on Create project.
Add Firebase To Your Flutter App
In your project dashboard, click on the Flutter icon to register an Android and iOS app to Firebase. Then follow the appropriate instructions as listed below.
Android Configuration
Update /android/build.gradle file with the following code:
1
2
3
4
5
6
7
8
9
10
11
12
buildscript {

repositories {
// Make sure that you have the following two repositories
google() // Google's Maven repository
mavenCentral() // Maven Central repository
}

dependencies {
// Add the dependency for the Google services Gradle plugin
classpath 'com.google.gms:google-services:4.3.14'
}
Confirm you have the google-services.json file from Firebase in the /android/app/ folder; otherwise, download it from the console and include it.
Finally, update the /android/app/build.gradle file with the following code snippet:
1
2
apply plugin: 'com.android.application'
apply plugin: 'com.google.gms.google-services'
iOS Configuration
Using Xcode, open the projectsios/Runner.xcworkspace`.
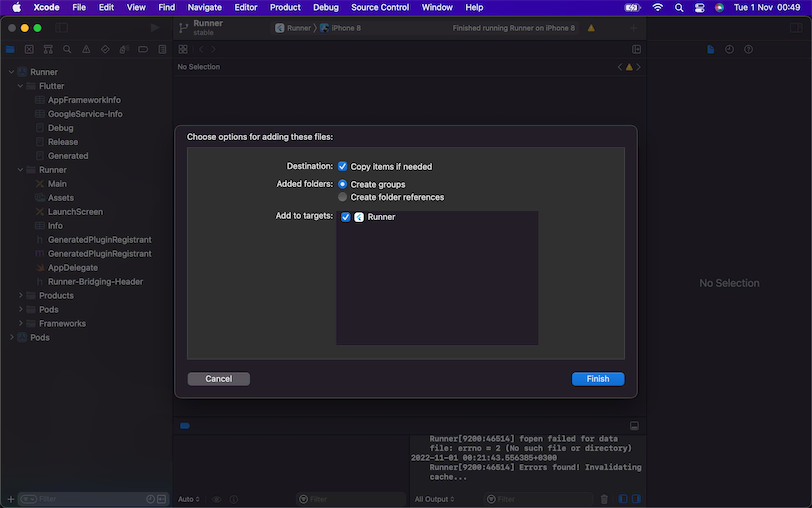
Download the GoogleService-Info.plist file from the Firebase console, drag it to the root folder of your project on Xcode IDE and ensure the “Copy items” box is checked, and select to add the config file to all targets.
You’ll need to configure your app for APNs by enabling push notifications in Xcode under App > Signing & Capabilities.
Please note that you need to be enrolled to the paid developer program to see this capability. Even though FCM itself is free, it uses APNs to deliver notifications to iOS devices.
You’ll also need to enable the “Background fetch” and “Remote notifications” options under App > Signing & Capabilities.
Lastly, upload your APNs certificate created in the Apple Developer Center to Firebase.
Add Required Dependencies
Now that you’re done with the configuration, it's time to add the dependencies that will help you implement Firebase Cloud Messaging.
Install firebase_core and firebase_messaging by running the following commands in your project terminal:
1
2
flutter pub add firebase_core
flutter pub add firebase_messaging
For iOS, open the terminal pointing at project_name/ios and run the following command to install the necessary dependencies:
1
pod installOnce the installation is finished, run your Flutter app by typing in the following:
1
flutter runIf everything runs well, great! However, you may get an error saying 'One or more plugins require a higher Android SDK version.' or 'The plugin firebase_messaging requires a higher Android SDK version.' To fix those errors, go to /android/app/build.gradle and change the minSdkVersion to 19.
Retrieve the FCM Token
Now that everything's working, you can move on to the actual implementation. In this section, you’ll retrieve the FCM Token, which can be used to identify a specific device to send notifications to.
Create the basic structure for your app. Start by clearing everything from the main.dart file. Then add the following code to it:
1
2
3
4
5
6
7
8
9
10
11
12
13
14
15
16
17
18
19
20
21
22
23
24
25
26
27
28
29
30
31
32
33
34
35
36
37
38
39
40
41
42
43
44
45
46
47
48
import 'package:flutter/material.dart';
import 'package:firebase_core/firebase_core.dart';
import 'package:firebase_messaging/firebase_messaging.dart';
import 'firebase_options.dart';
void main() {
runApp(MyApp());
}
class MyApp extends StatefulWidget {
const MyApp({super.key});
@override
State<MyApp> createState() => _MyAppState();
}
class _MyAppState extends State<MyApp> {
@override
Widget build(BuildContext context) {
return MaterialApp(
home: Scaffold(
appBar: AppBar(
title: Text("Notifications App"),
),
body: Center(
child: Column(
mainAxisAlignment: MainAxisAlignment.center,
children: [
Text(
"Notification Title",
style: TextStyle(
fontSize: 28,
color: Color.fromARGB(255, 79, 79, 79),
fontWeight: FontWeight.bold),
),
Text("Notification Body",
style: TextStyle(
fontSize: 16,
color: Color.fromARGB(255, 79, 79, 79),
fontWeight: FontWeight.bold),
)
],
),
),
),
);
}
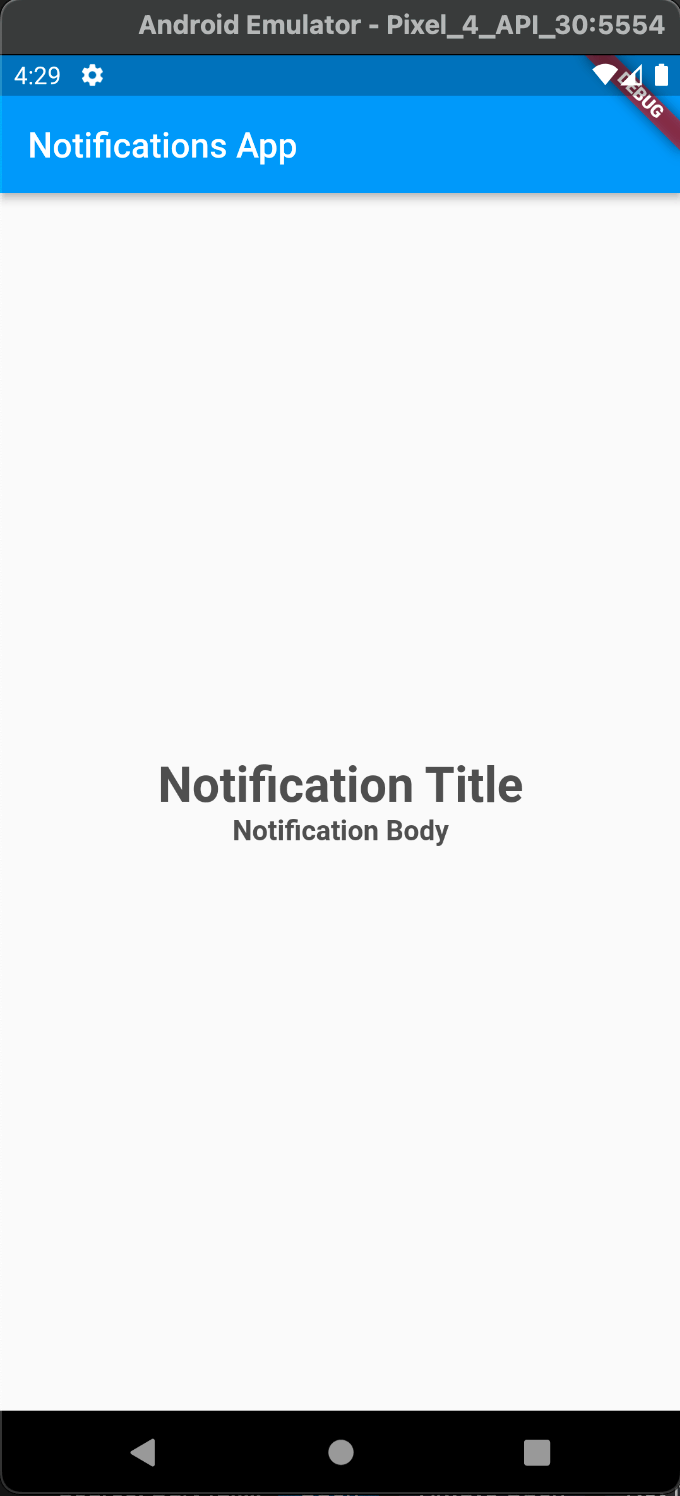
}In the above code, you’ve created a stateful widget that contains two text boxes inside it with some styling specifications. You’ve also imported all the required libraries.
Here's what the UI looks like now:
Next, initialize Firebase in your app by modifying the main function as follows:
1
2
3
4
5
6
7
void main() async {
  WidgetsFlutterBinding.ensureInitialized();
  await Firebase.initializeApp(
    options: DefaultFirebaseOptions.currentPlatform,
  );
  runApp(MyApp());
}
Firebase needs access to native code to run initializeApp(), which is why you’re using WidgetsFlutterBinding.ensureInitialized().
Now, before you can receive any notification messages, you must ask for permission from the iOS user. The following code snippet does just that, with options to tweak the permissions you need granted:
1
2
3
4
5
6
7
8
9
10
11
FirebaseMessaging messaging = FirebaseMessaging.instance;

NotificationSettings settings = await messaging.requestPermission(
alert: true,
announcement: false,
badge: true,
carPlay: false,
criticalAlert: false,
provisional: false,
sound: true,
);
Finally, add this code to the state object:
1
2
3
4
5
6
void initState() {
    super.initState();
    FirebaseMessaging.instance
        .getToken()
        .then((value) => {print("FCM Token Is: "), print(value)});
  }
Now, you can run your app! You should see the FCM token being printed in the console:

Send A Test Notification
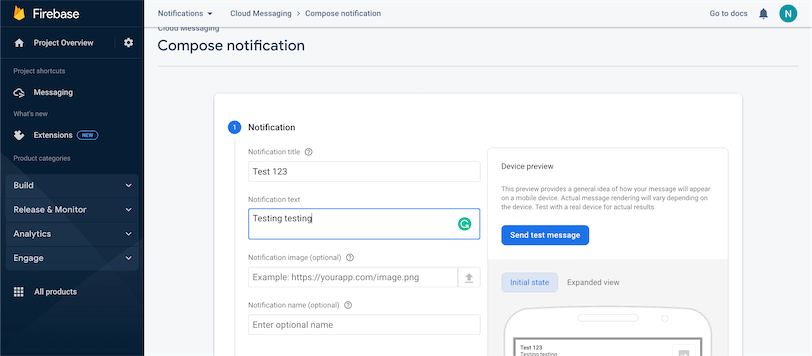
Copy the FCM Token from the console and minimize the app on your emulator. Then go to your project view in Firebase. Under the Build section, click on Cloud Messaging and then select the Create your first campaign button.
Enter the notification title and body content in the respective fields and then click on Send test message.
In the pop-up, enter your device's FCM Token and click on the “+” icon. Then select Test.
You should hear a chiming sound as you receive the notification.
Notification Handling
Now that you’re able to receive notifications, it's time that you "handle" them—that is, setting up the actions you’ll perform upon receiving the notifications from Firebase.
Messages are handled differently depending upon the device state, which can fall into three main categories:
- Foreground: The app is being used by the user in the foreground.
- Background: The app has been minimized, and the user is using a different app.
- Terminated: The app is not running or the device is locked.
Foreground Handling
In this example, you’ll automatically update the UI with the notification title and body content upon receipt of the notification.
First, declare two global variables: notifBody and notifTitle:
1
String? notifTitle, notifBody;Then, in your initState() function, subscribe to the onMessage stream as follows:
1
2
3
4
5
6
7
8
9
10
11
FirebaseMessaging.onMessage.listen((RemoteMessage message) {
  print('Got a message whilst in the foreground!');
  print('Message data: ${message.data}');
  if (message.notification != null) {
    print('Message also contained a notification: ${message.notification}');
    setState(() {
      notifTitle = message.notification!.title;
      notifBody = message.notification!.body;
    });
  }
});
Upon receiving a message, it will get printed to the console. The notification title and body will be extracted, and the UI state will be updated with setState(). This will force the widgets to rebuild with the updated data and your UI will update.
Now go down to the text boxes in the Scaffold and modify the content as follows:
1
2
3
4
5
6
7
8
9
10
11
12
13
14
Text(
    "${notifTitle != null ? notifTitle : "Notification Title Goes Here"}",
    style: TextStyle(
        fontSize: 28,
        color: Color.fromARGB(255, 79, 79, 79),
        fontWeight: FontWeight.bold),
),
Text(
    "${notifBody != null ? notifBody : "Notification Body Goes Here"}",
    style: TextStyle(
        fontSize: 16,
        color: Color.fromARGB(255, 79, 79, 79),
        fontWeight: FontWeight.bold),
),
In this code, tertiary operators have been used for display based on conditions. If the variable is not null, its value will be displayed; otherwise, the user will see some placeholder text.
Initially, you declared the notifications as null, so the placeholder text will be shown until you receive a notification while the app is in the foreground.
Run your app in the foreground, send a test message from the Firebase console, and see how the UI updates automatically!
Background Handling
For background handling, you’ll register a top-level onBackgroundMessage handler.
Note that the handler cannot execute any UI updating logic as it runs outside the application's context.
Here's the handler you’ll use for this app:
1
2
3
4
5
@pragma('vm:entry-point')
Future<void> _firebaseMessagingBackgroundHandler(RemoteMessage message) async {
  await Firebase.initializeApp();
  print("Handling a background message: ${message.messageId}");
}
It's a simple function that prints the message ID to the console upon receiving a message.
After implementing this code, modify the main() function by adding this line to it:
1
FirebaseMessaging.onBackgroundMessage(_firebaseMessagingBackgroundHandler);Now, you can test this by sending a notification from Firebase while your app is in the background.
Handling Interactions
Right now, there's a problem with the app: When you click on a notification to open the app, the UI doesn't update with the notification's data.
Ideally, when the user clicks on the notification, the app should open from the background and the UI should update with the new title and body.
This can be implemented by adding the following code to the initState() function:
1
2
3
4
5
6
7
8
9
10
11
FirebaseMessaging.onMessageOpenedApp.listen((RemoteMessage message) {
  print('Opened a notification');
  print('Message data: ${message.data}');
  if (message.notification != null) {
    print('Message also contained a notification: ${message.notification}');
    setState(() {
      notifTitle = message.notification!.title;
      notifBody = message.notification!.body;
    });
  }
});
Here, you’re subscribing to the onMessageOpenedApp stream. Upon opening the app by clicking a notification, some text is printed to the console and the UI state is updated.
You can consult this repo for a complete implementation.
Multi-Channel Push Notifications with Courier
With Courier’s multi-channel solution, you can send notifications to multiple platforms like push (FCM, APNs, Onesignal, etc.), email, Slack, SMS, and more—all from one place.
Pros of Courier
- It supports formatted messages for every channel.
- The drag-and-drop editor is very easy to use.
- It provides detailed logging to identify issues.
- It’s consolidated, and thus much easier to manage than multiple other apps.
- It provides fast and helpful customer support.
Cons of Courier
- It’s not completely free like FCM.
- The app’s UI can be complex.
How To Implement Courier
Read on to learn how to implement push notifications with Courier!
Create an Account
Start by visiting Courier's website. Click on the Sign Up button.
The free account comes with 10,000 messages per month, which should be enough for most small apps and projects. Enter your email or use the social integrations to sign up.
On the onboarding page, enter all the details requested and then click Continue. Select the channels you'd like to use. For this tutorial, choose Push.
Choose Android and iOS as the tech stack. After that, follow the testing instructions as provided.
Add Push as a Channel
Once you're in your dashboard, go to the Channels page from the sidebar. Select Firebase FCM from the push list.
You'll be required to input your Service Account JSON:
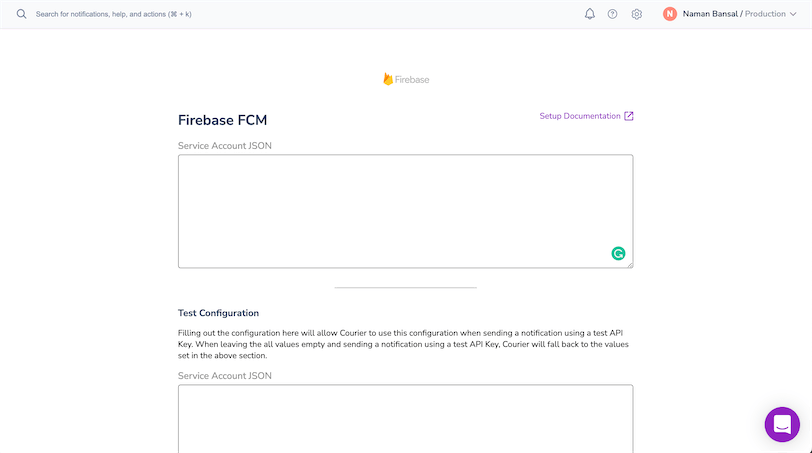
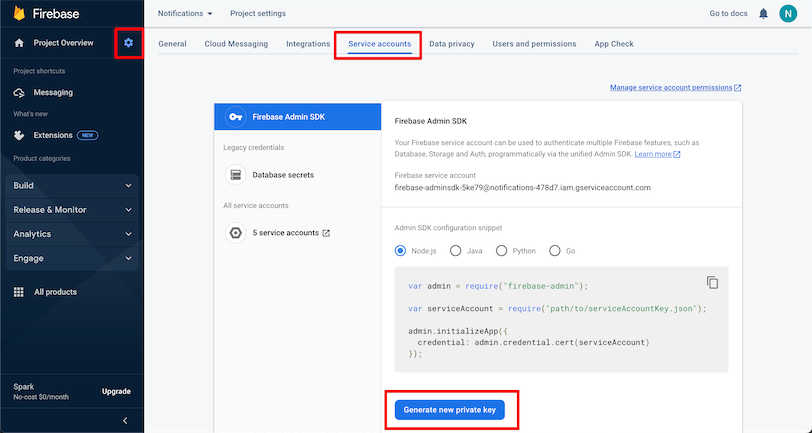
To retrieve that, go to your project settings in the Firebase console. Select Service Accounts and then click on Generate New Private Key. Be sure to store the JSON file safely.
Open the JSON file, copy everything, and paste it into the Service JSON field in Courier. Then click Install Provider.
Send a Multi-Channel Notification
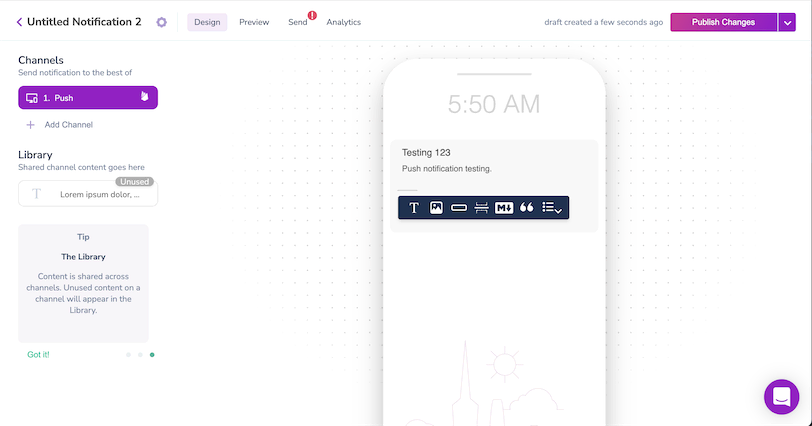
Now go to the Designer tab in the sidebar. Click on Create Notification and select the Push channel.
In the notification designer, you can add placeholders, text, images, lists, and more. Click on Publish Changes once you're done designing your template.
Next, switch to the Preview tab and click on Create Test Event. In the editor, add the following:
1
"firebaseToken": "DEVICE_FCM_TOKEN_HERE",Save your changes.
Finally, go to the Send tab and copy the code to integrate with your codebase. Run it to see how it works! It may take a minute or two for the notification to arrive.
Conclusion
The list of use cases for push notifications is endless. Now you know how to implement them in your Flutter app running on Android or iOS. You can always use APNs or FCM to do so, but be sure to consider Courier for the fastest, easiest implementation. Courier provides amazing support, lots of channel integrations, and an intuitive app to manage all your notifications. Start sending for free or schedule a demo to learn more.
Author: Naman Bansal