Technology is transforming people’s needs and expectations for communication. Many users want or need to receive reliable, timely alerts and notifications, even when they aren’t actively using an application. On mobile devices, push notifications serve this purpose. They look like any other alert on the device to inform users of messages or events, but they only reach users who’ve installed the application.
Push notifications are a powerful way for application publishers to engage users directly. Publishers can use them on most mobile platforms and at any time—you don’t need to be using a given application to receive them. They bypass spam filters and are frequently used to drive actions, like telling the user about a special discount, a weather event, or a financial transaction that needs to be confirmed.
In this article, you’ll learn how to implement push notifications using Expo, a platform for making universal native applications. You’ll see the steps and flow that push notifications go through to arrive on mobile devices and learn how you can send your own. While many of these steps can be done through the Expo platform, you’ll also take a look at using Courier to simplify the process.
Expo Push Notifications
Expo is an open source platform used by engineers to develop native applications that can run on Android, iOS, and the web. It includes a universal runtime and several libraries to interface with each OS, and you can develop Expo applications by writing React and JavaScript. Among its functionalities, Expo also makes it easy to enhance applications by adding notifications.
Leveraging Expo, you can implement two types of application notifications:
Local notifications are triggered by the application installed on a device. This type of notification never involves sending notifications to other devices, such as when you receive a reminder from your calendar app.
Push notifications are sent to applications running on other devices. The receiving application needs to handle the notification and display it to the user, like when you receive a message on a chat app.
When targeting mobile devices, applications usually have to interact with notification gateways to send push notifications. These are services that offer APIs, which allow applications to send push notifications to users through HTTP requests. Targeting users on other devices, applications need to either integrate with Firebase Cloud Messaging (FCM) or the Apple Push Notification service (APNs), two of the most-used messaging platforms for mobile devices.
This means delivering notifications successfully requires you to configure FCM and APNs credentials and also requires appropriate handling of their APIs.
Push Notification Flow
To set up push notifications, the first step is to collect unique keys issued by FCM and APNs, called push tokens. They’re used to identify apps installed on devices and are necessary to send messages to specific devices. These keys need to be stored in a secure environment, such as backend infrastructure or a serverless solution, before calling the notification gateways.
You can choose to deal with the gateways directly, but this introduces many complexities—you would need to differentiate between native tokens (like Android and iOS), write code to call both gateways, and account for disparate error-handling procedures.
Instead, you can utilize Expo, which offers a push notification service to handle this behind the scenes, on behalf of the application. The Expo gateway manages the native device information and communicates with notification gateways. The expo-notifications package provides an API that facilitates fetching push notification tokens as well as presenting, scheduling, receiving, and responding to notifications.
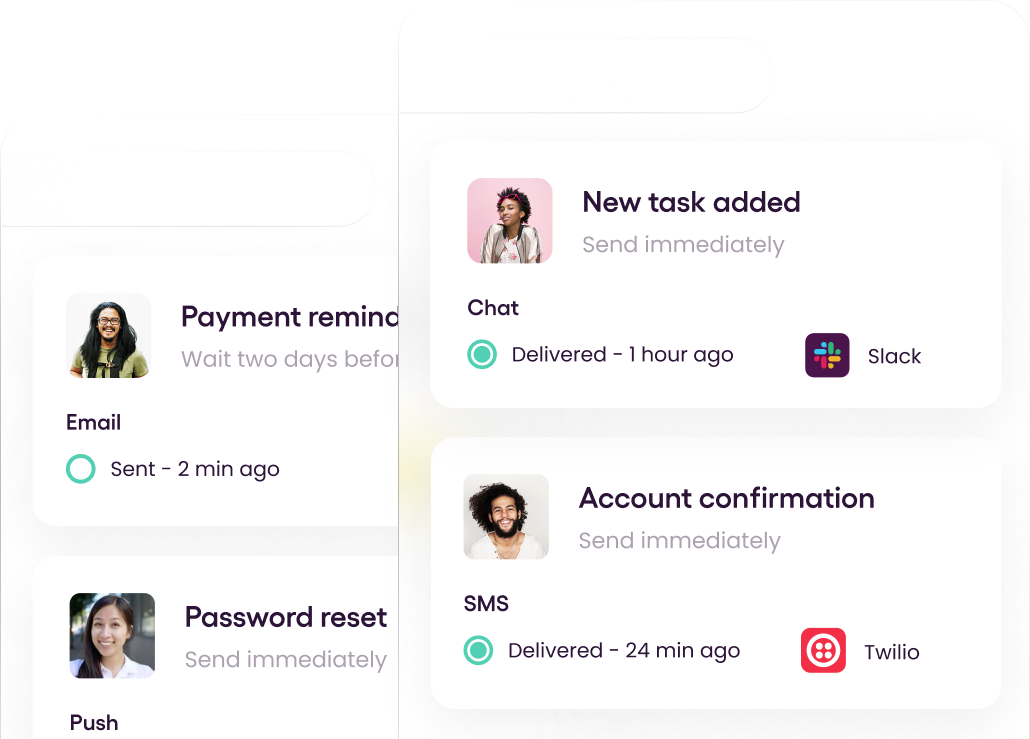
For a more seamless solution, you can integrate Courier with Expo. Courier provides an intelligent notification infrastructure. Applications can emit events that are sent to Courier using their SDK or API. Courier receives the notification request, processes it, and then generates a notification template and sends it to the appropriate provider.
Implementing Expo Push Notifications
In this section, you’ll learn how to enhance your Expo application with push notifications. As you’ll see, using the Expo gateway directly and leveraging Courier to execute your push notifications is easy.
Send Notifications via the Expo Gateway
If you are just starting out developing Expo applications, you’ll first need to download some dependencies:
The Expo Go app enables you to open up your applications, served through the Expo CLI, and run your projects while developing them. You can find installation instructions for both of these dependencies here.
To use the Expo gateway, you’ll need to register with Expo. Run the command below to open a tab in your browser where you’re able to sign up:
1
~ npx expo registerNext, you need to log in with Expo, so that the application is able to send notifications through the gateway. Run the command below and supply your username and password:
1
~ npx expo loginYou’re now ready to create your application. When you run the command below, you can create the skeleton of an Expo application. You’ll use this to build your application.
1
~ npx create-expo-app my-appBefore you can develop your application, or add code for sending and receiving notifications, you need to install the following packages:
1
~ cd my-app && npm i expo-device && npm i expo-notificationsPush notifications require the user's permission and for you to receive the user's ExpoPushToken, which is done through the expo-notifications library. To retrieve the permissions, use the requestPermissionsAsync and getExpoPushTokenAsync functions to get the ExpoPushToken. You can refer to the example below to see how this can be done:
1
2
3
4
5
6
7
8
9
10
11
12
13
14
15
16
17
18
19
20
21
22
23
24
25
26
27
28
29
30
31
32
33
34
35
36
37
38
39
40
41
42
43
44
import * as Device from 'expo-device';
import * as Notifications from 'expo-notifications';
import React, { useState, useEffect, useRef } from 'react';
import { Text, View, Button, Platform } from 'react-native';
import { CourierClient } from "@trycourier/courier";

Notifications.setNotificationHandler({
 handleNotification: async () => ({
   shouldShowAlert: true,
   shouldPlaySound: false,
   shouldSetBadge: false,
 }),
});

async function registerForPushNotificationsAsync() {
 let token;
 if (Device.isDevice) {
   const { status: existingStatus } = await Notifications.getPermissionsAsync();
   let finalStatus = existingStatus;
   if (existingStatus !== 'granted') {
     const { status } = await Notifications.requestPermissionsAsync();
     finalStatus = status;
   }
   if (finalStatus !== 'granted') {
     alert('Failed to get push token for push notification!');
     return;
   }
   token = (await Notifications.getExpoPushTokenAsync()).data;
   console.log("Expo push token:", token);
 } else {
   alert('Must use physical device for Push Notifications');
 }

 if (Platform.OS === 'android') {
   Notifications.setNotificationChannelAsync('default', {
     name: 'default',
     importance: Notifications.AndroidImportance.MAX,
     vibrationPattern: [0, 250, 250, 250],
     lightColor: '#FF231F7C',
   });
 }

 return token;
}
Once you have the token, you are ready to send push notifications. The following code snippet is an example of a message template, which will be used to send a push notification.
1
2
3
4
5
6
7
8
9
10
11
12
13
14
15
16
17
18
19
async function sendPushNotification(expoPushToken) {
 const message = {
   to: expoPushToken,
   sound: 'default',
   title: 'Test title',
   body: 'Test body',
   data: { testData: 'test data' },
 };

 await fetch('https://exp.host/--/api/v2/push/send', {
   method: 'POST',
   headers: {
     Accept: 'application/json',
     'Accept-encoding': 'gzip, deflate',
     'Content-Type': 'application/json',
   },
   body: JSON.stringify(message),
 });
}
The sendPushNotification function creates a test message that will be sent as a push notification. Sending a POST request to the Expo gateway API, with a token identifying the target user, will send the notification. In this example, the target user is the application itself. In practice, this means the application will send a push notification to itself. Naturally, this means that you need to add the capability of receiving notifications, which you can see in the code below:
1
2
3
4
5
6
7
8
9
10
11
12
13
14
15
16
17
18
19
20
21
22
23
24
25
26
27
28
29
30
31
32
33
34
35
36
37
38
39
40
41
42
43
44
45
export default function App() {
 const [expoPushToken, setExpoPushToken] = useState('');
 const [notification, setNotification] = useState(false);
 const notificationListener = useRef();
 const responseListener = useRef();

 useEffect(() => {
   registerForPushNotificationsAsync().then(token => setExpoPushToken(token));

   notificationListener.current = Notifications.addNotificationReceivedListener(notification => {
     setNotification(notification);
   });

   responseListener.current = Notifications.addNotificationResponseReceivedListener(response => {
     console.log(response);
   });

   return () => {
     Notifications.removeNotificationSubscription(notificationListener.current);
     Notifications.removeNotificationSubscription(responseListener.current);
   };
 }, []);

 return (
   <View
     style={{
       flex: 1,
       alignItems: 'center',
       justifyContent: 'space-around',
     }}>
     <Text>Your expo push token: {expoPushToken}</Text>
     <View style={{ alignItems: 'center', justifyContent: 'center' }}>
       <Text>Notification Title: {notification && notification.request.content.title} </Text>
       <Text>Notification Body: {notification && notification.request.content.body}</Text>
       <Text>Notification Data: {notification && JSON.stringify(notification.request.content.data)}</Text>
     </View>
     <Button
       title="Press to Send Notification"
       onPress={async () => {
         await sendPushNotification(expoPushToken);
       }}
     />
   </View>
 );
}
This snippet adds event listeners (addNotificationReceivedListener and addNotificationResponseReceivedListener) that receive an object when a notification is received or interacted with. This snippet also adds a basic UI that allows you to test the application by clicking a button that sends the previously defined test message.
Once these steps are completed, you can use your application. Run the command below and scan the QR code with the Expo Go app to deploy the application to your device. An added benefit of using the Expo Go app is that any code changes will be automatically deployed to your device and ready to be tested immediately.
1
2
3
4
5
6
7
8
9
10
11
12
13
14
15
16
17
18
19
20
21
22
23
24
25
26
27
28
29
30
31
~ npx expo start
Starting project at /Users/ricardo.castro/projects/learning/expo/my-app
Starting Metro Bundler
▄▄▄▄▄▄▄▄▄▄▄▄▄▄▄▄▄▄▄▄▄▄▄▄▄▄▄
█ ▄▄▄▄▄ █▀▄█▀ ▄█ ▄█ ▄▄▄▄▄ █
█ █   █ █▄   ▄██▀ █ █   █ █
█ █▄▄▄█ █ ▀█▀█ █ ██ █▄▄▄█ █
█▄▄▄▄▄▄▄█ ▀▄█ █ █▄█▄▄▄▄▄▄▄█
█▄▄▀▄▀▀▄▄▀█ ▀█▄▀▄▄▀  ▄▀▄▄▀█
██▀▀ ▄▀▄█ ▄▄██▀ ▀▄▄▀ ▀▀█▄▄█
█▄  ▀██▄ ██▀▀ ▄ █▀█ ▄█ ██▀█
█▄▀█▀█ ▄▀▀▀ █ ▀▀█ ▄▄ ▀▀██▄█
█▄▄█▄▄▄▄▄▀▄▄▄▄█▄  ▄▄▄ █ ▄ █
█ ▄▄▄▄▄ █▄ █▀▄█   █▄█  ▀▄▄█
█ █   █ █▀▄▀▄█ ▀▀▄ ▄▄ █▀▄██
█ █▄▄▄█ █▀▀▀█▄  █  █▄  ▄█▄█
█▄▄▄▄▄▄▄█▄▄███▄▄█▄███▄▄█▄▄█

› Metro waiting on exp://192.168.1.185:19000
› Scan the QR code above with Expo Go (Android) or the Camera app (iOS)

› Press a │ open Android
› Press i │ open iOS simulator
› Press w │ open web

› Press r │ reload app
› Press m │ toggle menu

› Press ? │ show all commands

Logs for your project will appear below. Press Ctrl+C to exit
You can also use the Expo push notification tool, a web interface that allows you to send notifications. The code snipped above prints out the ExponentPushToken, which you can use to test different messages.
Send Notifications Using Courier
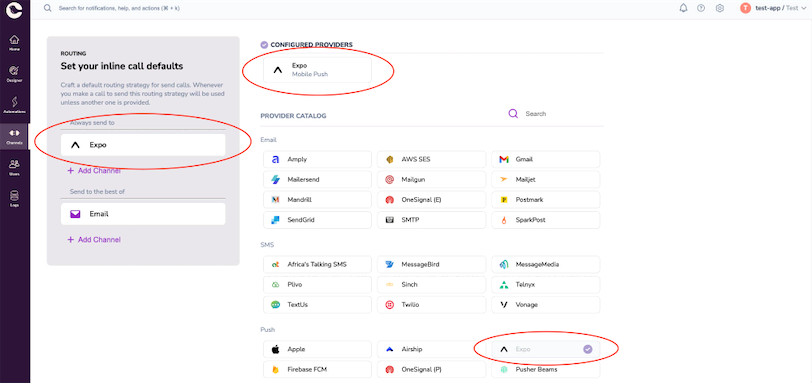
Alternatively, you can register with Courier and leverage it to send your notifications. Once you have signed up, you need to configure a channel. Courier allows you to choose between FCM, APN, or Expo. For this example, you’ll configure an Expo channel, letting the Expo gateway deal with the notification gateways:
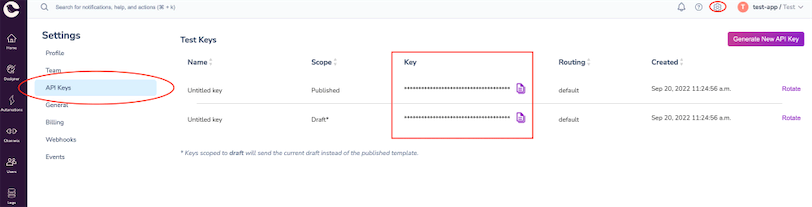
After successfully configuring the Expo channel, you need to retrieve the API keys to complete the Courier configuration:
Once configuration is done, change the application to integrate with Courier. First, install the @trycourier/courier package, which you can do by running the following command in your command line:
1
~ npm install @trycourier/courierNext, change the sendPushNotification function to send notifications through Courier instead of the Expo gateway, as shown in the example below:
1
2
3
4
5
6
7
8
9
10
11
12
13
14
15
16
17
18
19
20
21
22
import { CourierClient } from "@trycourier/courier";

const courier = CourierClient({ authorizationToken: "YOUR_API_KEY" });

async function sendPushNotification(expoPushToken) {
 const { requestId } = await courier.send({
   message: {
     to: {
       expo: {
         token: expoPushToken,
       }
     },
     content: {
       title: "Welcome!",
       body: "From Courier",
     },
     data: {
       fakeData: "data",
     },
   },
 });
}
Your application is now ready to send notifications through Courier, while the code to handle receiving notifications remains the same. The Expo Go app will automatically redeploy the application to your device so you can test it immediately.
The full working example application can be found here.
Conclusion
Push notifications are a powerful tool for application developers. You can use them for alerts, updates, critical communication, and as a valuable marketing tool for direct access to your users.
This direct access requires push notifications to go through notification gateways before arriving at the user’s devices. However, handling multiple gateways can be complex. Expo makes it easier to send push notifications through its notification gateway, and you can refine this process by integrating Courier.
Courier simplifies sending push notifications and offers seamless integration with Expo. It also provides a notification infrastructure capable of delivering notifications to a multitude of channels, like email or SMS. If you would like to learn more, check out our website and documentation.
Author: Ricardo Castro