How To Add A Provider To A Channel
A step-by-step guide integrating and to adding a provider to a Courier notification channel.
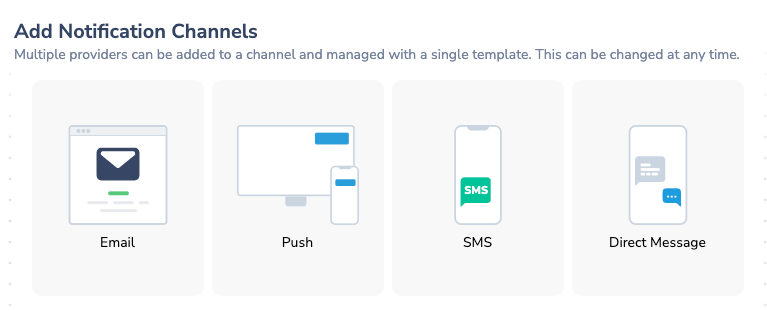
Every notification channel needs an integration before it can send. Multiple channels, and multiple providers within a channel, can be added and managed with a single template. This can be changed at any time.
If you've already configured an Integration for the Channel type(s) in your Notification you'll be able to add them with a single click. If you haven't already completed an Integration for the Channel type, you will need to configure one.
There are two places to configure a Provider integration:
- The Channel Settings in the Notification you're designing
- The Integrations tab of the Courier app.
1. Integrate a Provider via the Channel Settings
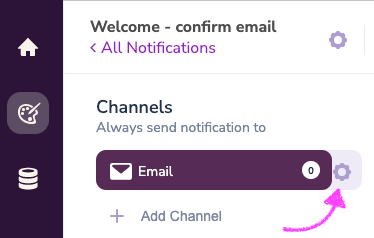
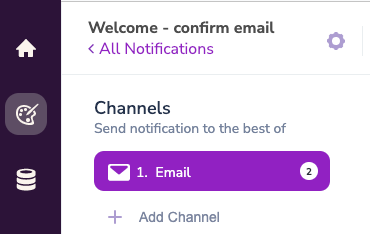
A 0, disconnected plug icon or red exclamation mark❗️ on a notification channel all indicate the channel does not have an integrated Provider. Until you add an integrated provider, you won't be able to send the Notification via that channel. If your channel indicates that there are no providers integrated, hover over the channel and click the settings icon ⚙️ .
The Channel Settings allow you to add integrations from the Designer view in the Notification you're currently building by:
- Clicking Add Integration and EITHER
- Selecting a Channel Integration that is already configured OR
- Configure a new integration
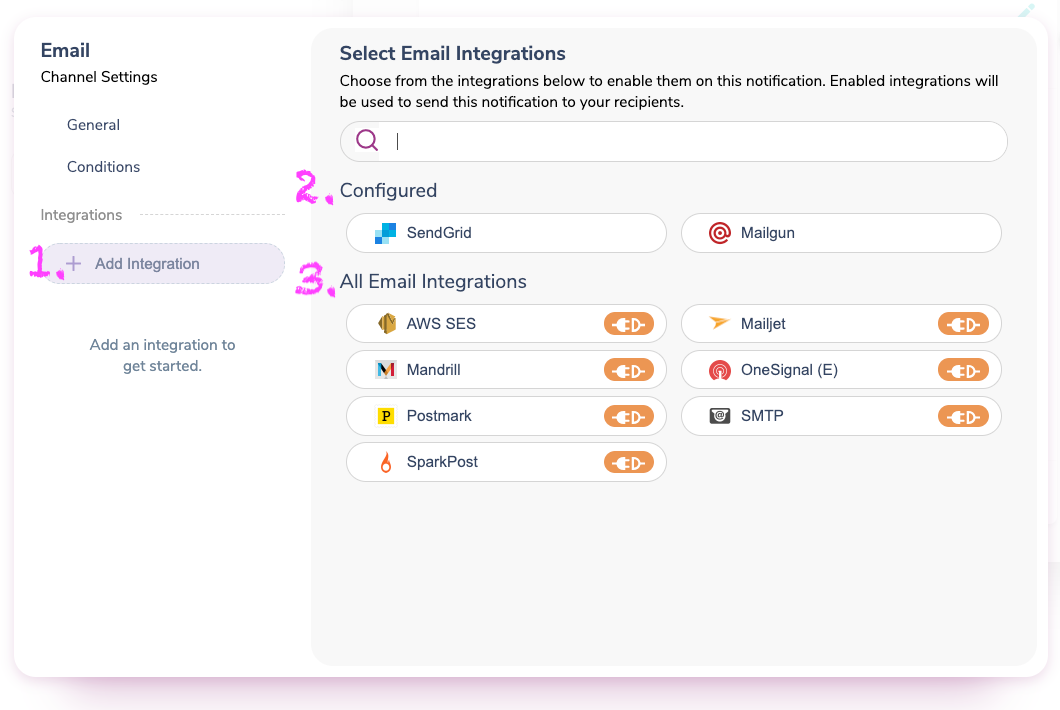
Adding a configured Integration to a Channel
- Click "Add Integration"
- Select one (or more) of your configured integrations.
Configuring an Integration via the Channel Settings
- The requirements to configure an integration depend on the specific Channel Provider.
- The Integration form will indicate all the information needed from your provider account to complete the configuration.
Success!
If you've successfully integrated your channel, you will see the provider icon when you close the Channel Settings. If you've configured more than one provider, you will see a count of the number of providers.
Multiple providers can be added to a channel and managed with a single template. If you select channel type when adding a new channel (ie Email, push, SMS, Direct Message).
If you add more than one integration, a number on the channel will indicate how many integrations have been added.
The configuration process does not validate the integration information you've provided.
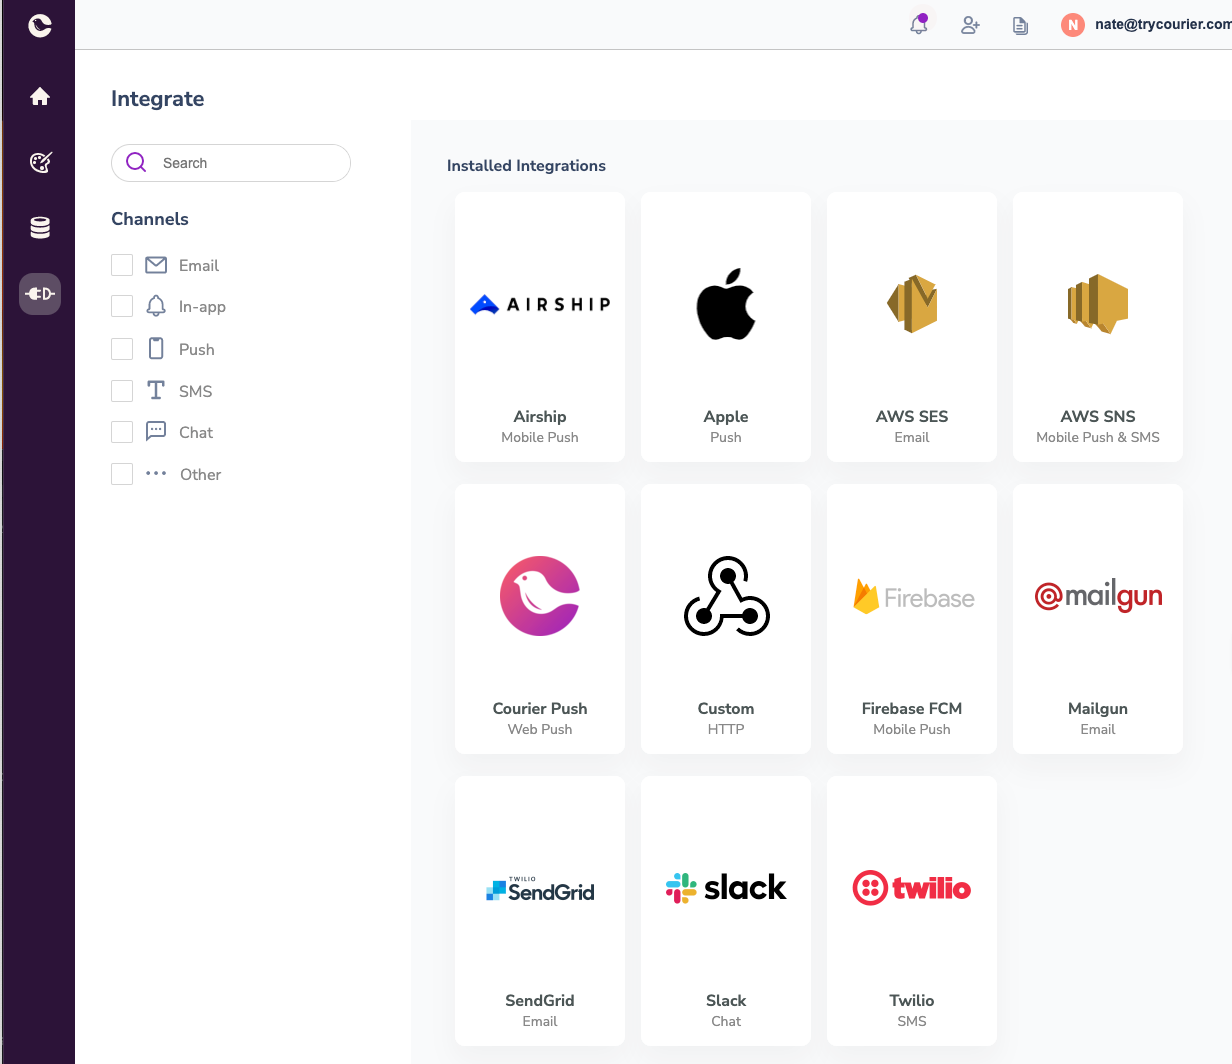
2. Integrating a Channel via the Integrations Tab
The Integrations tab allows you to add new integrations, view and manage installed Integrations, and see the entire catalog of Courier Integration options.
To configure a new Integration via the integration settings page:
- Open the Integrations tab
- Search for and choose your channel provider from the Integration Catalog.
- Configure the integration by completing the form with the required information.
- You will see your newly configured provider in the Installed Integrations section.
- Open the Notification Designer and follow the steps outlined above for adding a configured Integration to a Channel.
The specific information required depends on the provider.
⚠️ Note also that Courier does not validate your configuration in the Integration dialogue.